Stitch Pics & More
These are just a few examples of stitches. Possiblilites will emerge through your own creativity.
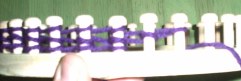
Begin with the yarn end in hand, inside the loom
Wrap each peg around, the wrap should look like the letter e
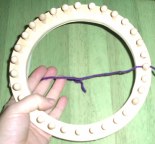
This Cast On stitch is called an e-WrapStitch.
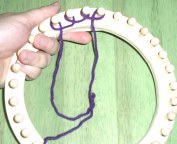
Each Peg is individually wrapped, with the twist to the inside of the Loom.
It is called an eeeee stitch as that is what the yarn should look like if laid on a flat surface
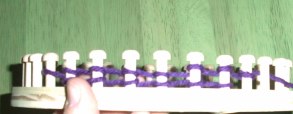
 This is the side view of the Cast On ~Wrap Stitch.
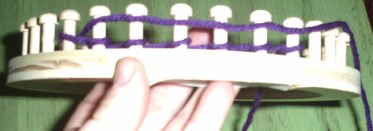
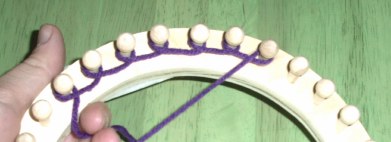
This is a Flat Stitch.
Notice the primary row of Cast On Stitches. A Flat Stitch, does not wrap around the pegs individually, It is laid against the peg, along the outside of the loom. The bottom stitch is lift up & over. As you KO for the Flat sts. Indent the yarn to the side of the peg, with your finger or Knitting Tool. Too tight a sts will cause dificulty in KO on your next circuit around the Loom
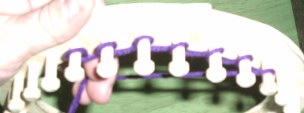
The Wrap Stitch:
The pegs, contain the primary Cast On stitch, plus the Wrap Stitch above it. The Wrap Stitch is wrapped around the peg, with the twist of yarn to the inside, only one loop of the yarn shows on the outside of the peg. If 2 loops of yarn show on a single stitch, it is wrapped around the peg incorrectly.
DW & DF
Both the Carry Stitch & the Wrap Stitch can be made firmer by completeing a full circuit of stitches, Then begin working your stitches on the third (3) circuit. Lifting the bottom stitcheup & over the top stitch. Many patterns will only signify this double stitch as lift 1over 2.
The second circuit of a flat sts for the Double Sts MUST be laid VERY Loosely
Lifting Off the stitch or Knitting Off
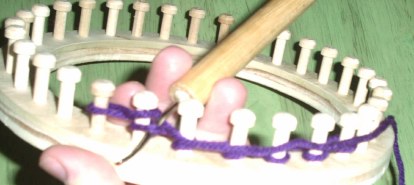
Engaging the bottom stitch for Knitting Off
Preparing to lift the stitch over the top stitch & peg.
These stitches are commonly used on Round Knitting Looms. They can be used for the Knitting Frame, but the stitching for creating a double knit project are a bit different.
You can increase, decrease & bind off your projects on the Loom.
To create a project one size smaller than the loom is designed for: You can craft items slightly smaller than the size of the loom by skipping 4-8 pegs, on the Loom, equilaterly.
To size down one inch, Skip 4 pegs - 1 peg each at the North, South, East & West compass positions.
To size down 2 inches, Skip 8 pegs - 1 peg each at the North, northeast, east, southeast, South, southwest, west, & northwest cpmpass points.
At the completion of the project, stretch the project lengthwise & then width wise, to set the stitches. this will take up any loose stitching caused by the skipped pegs.
To decrease the size dramatically, skip every other peg around the loom, through out the project. If your loom has an odd number of pegs, At your starting position, designate 2 pegs together to be used throughout the project.
Many patterns are adaptable to use on the Round Looms & Knitting Frames.
 Increasing sts
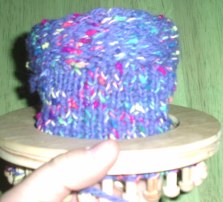 An Outie Cuff
Remove 5 sts at a time, & place onto a st holder.
( You may remove the entire projec tfrom the loom, replace the bottom stitches & replace the working stitches. YOU MUST have wrapped your last row loosely, to work the stitches back on)
Fold the primary row of knitting to the outside of the project
Replace primary row of sts onto vacated pegs
Return the removed sts to the pegs
Complete around the Loom until all pegs are used.
KO as is, without adding additional sts

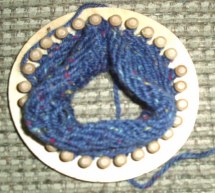
Easy Cuff
Pull the knitted project up through the center of the Loom
Place the sts from the primary row back onto their original pegs
KO as is, DO NOT add additional sts

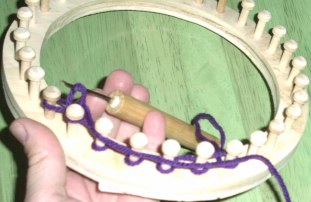
KO 2 over 1
Lifting 2 sts over 1
Creates a firm sts where one strand is used but a 2 strand thickness is desired
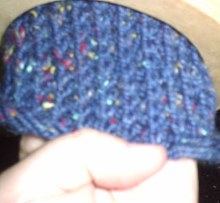
The project on the left is a carry sts The project on the right is an e-wrap
Copyright 2001, 2002 Hummersley Looms-JG Humphries
Not to be reproduced in whole or part
Contact Web Looney for comments, broken links or permission to link